
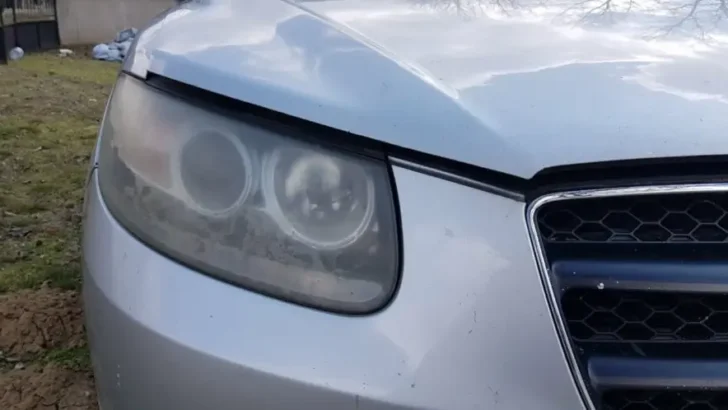
Are your lights getting cracked and are getting full of water when it rains? Today I’m going to show you how to replace a headlight housing on your car.
Modern headlight assemblies are much more complex than old cars. They come in sections, so you have to take a whole bunch of stuff off in order to get to the headlight housing.
Before we get started, I have to let you know. It is not uncommon for a vehicle to have panels or parts that need to be removed in order to change headlight assemblies. On some vehicles, you will have to remove the front bumper in order to gain access to the headlights.
Even though these procedures can be fairly easy, they are time-consuming.
- Key Takeaway
- How Do You Replace a Headlight Housing?
- 1. Gather the required tools
- 2. Make sure the engine is cold
- 3. Remove bolts that hold the headlight in place
- 4. Disconnect the electrical connector
- 5. Remove the old headlight assembly
- 6. Install headlight bulbs on the new assembly
- 7. Connect the electrical connectors on the new assembly
- 8. Slide the new headlight assembly into place
- 9. Test the new headlights
- How Do I Know If My Headlight Needs To Be Replaced?
- How Long Does It Take To Replace a Headlight Housing?
- How Long Do Headlight Housings Last?
- Do Headlight Assemblies Come With Bulbs?
- How Do I Know What Size My Car’s Headlights Are?
- How Do I Know If My Headlight Regulator Needs To Be Replaced?
- FAQs
- Q: What tools do I need to replace a headlight housing?
- Q: Can I replace a headlight housing myself?
- Q: How long does it take to replace a headlight housing?
- Q: What is the cost of replacing a headlight housing?
- Q: Are headlight housings interchangeable?
- Q: How often should I replace my headlight housing?
- Q: Where can I buy a replacement headlight housing?
- Q: Do I need to disconnect the battery before replacing a headlight housing?
- Q: Can I replace just one headlight housing or do I need to replace both?
- In Conclusion
Key Takeaway
- To replace a headlight housing, you need to gather the required tools, ensure the engine is cold, remove the bolts holding the headlight in place, disconnect the electrical connector, and then install the new housing.
How Do You Replace a Headlight Housing?
- Make sure the engine is cold.
- Remove the bolts that hold the headlight housing in place.
- Disconnect the electrical connectors. There should be a total of three.
- Pull out the old headlight assembly.
- Install new headlights to the new headlight assembly.
- Insert the headlight assembly and connect the electrical connections.
- Reinstall the bolts that hold the headlight in place.
Headlights are an important part of your car. They allow you to see what is in front of you while driving, and they also make it easier for other drivers to see your car on the road.
Over time, the headlights can become damaged or cracked, which can lead to decreased visibility while driving. In this blog post, I will walk you through how to replace the headlight housing on your car.
1. Gather the required tools
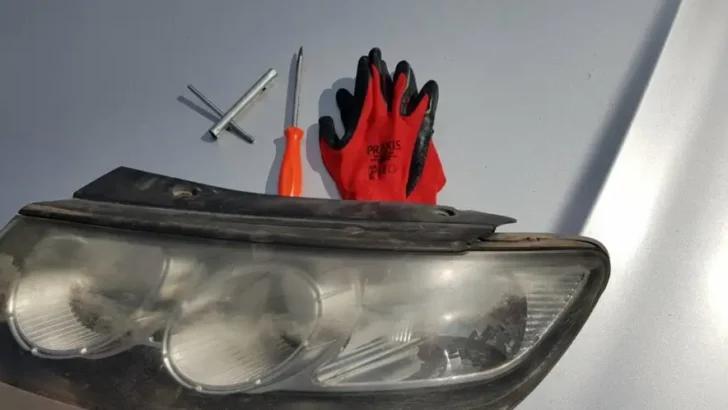
To replace the headlight assembly on your car, you will need a few basic tools:
- Gloves
- Flathead screwdriver
- Socket wrench set
- Headlight assembly
- Headlight bulbs
2. Make sure the engine is cold
Since you will be working very close to the engine, make sure that it is cold before starting. In order to replace the headlight housing, you will have to remove some screws that are found on the inside of the engine bay.
So, to avoid getting burned by the hot engine, make sure that the engine is cold. It takes around 20-30 minutes for a hot engine to cool down.
3. Remove bolts that hold the headlight in place
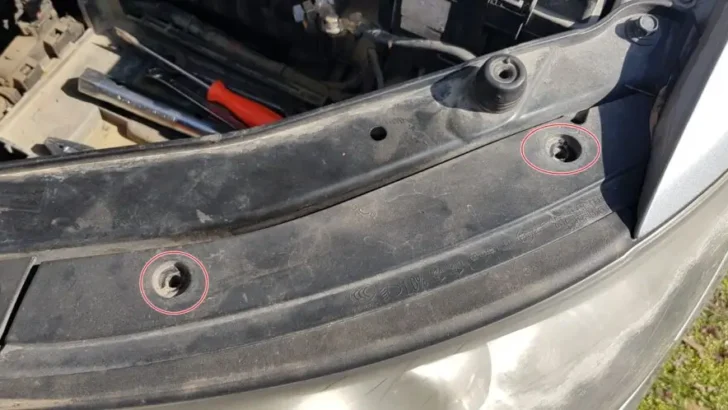
Usually, there are between two and four bolts on the top of the headlight assembly that holds it in place and on the backside of the headlight housing. You will be able to locate them by opening the hood. Once you’ve located them, remove them with a wrench or socket and store the bolts someplace safe.
On some vehicles, you might find screws instead of bolts. In that case, use a flathead screwdriver to remove the screws and store them for later on.
4. Disconnect the electrical connector

Every headlight assembly has electrical connectors on the back of the headlight. This electrical connector is what gives electricity to the headlight bulb.
Basically, remove any electrical cords that are preventing you from sliding out the headlight housing. They are usually different sizes, but just in case they are the same size, remember which connector goes where.
Some headlight assemblies might have more than one electrical connector. If your blinkers are connected to the headlight assembly, you will have two electrical connectors. In that case, remove both electrical connectors.
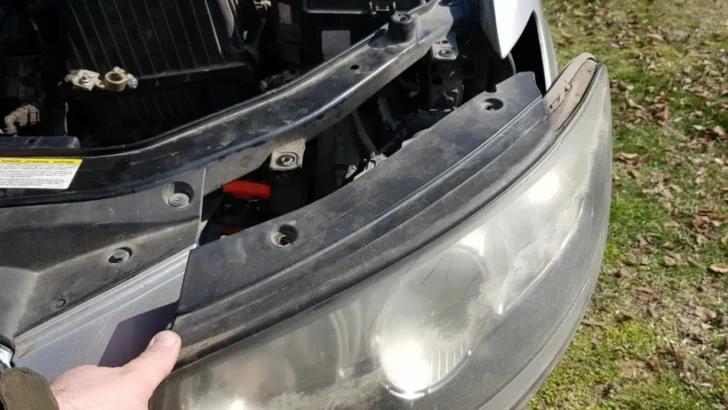
5. Remove the old headlight assembly

Once the bolts or screws that hold the headlight assembly have been removed and the electrical connectors have been disconnected, you can remove and replace the headlight housing by simply pulling it towards you.
There should be nothing holding the headlight housing and it should come out easily. If the headlight assembly isn’t coming out easily, there is probably some screw or bolt that you need to locate and remove.
Also, some headlight housings come out at a certain angle. So make sure to slowly try different angles. Just go easy as you don’t want to break anything.
6. Install headlight bulbs on the new assembly

Before installing the headlight assembly, you will need to install new headlight bulbs. In order to do so, remove the bulb sockets from the headlight assembly.
Be sure not to touch the bulbs with bare fingers. Nitrile gloves work great for this. Finger oil can cause hot spots that cause the bulb to burn out prematurely.
There is an electrical connector on the back of the head bulbs as well as a clamp that holds them in place. Disconnect the electrical connector and remove the clamp and then take out the old head bulb and insert a new one.
Secure the new headlight bulbs in their sockets and insert them into the new headlight assembly. Secure the headlamp by turning the retainer ring clockwise into its socket.
7. Connect the electrical connectors on the new assembly

Before performing this step, make sure that the electrical connectors are clean and debris-free. Sometimes dirt and debris, as well as water, can get into the electrical connectors.
In those cases, they won’t be able to power the headlight bulbs. If everything is right, reconnect the electrical connectors to the headlight assembly and blinkers says Car and Driver.
8. Slide the new headlight assembly into place
After reconnecting the electrical connectors to the new headlight assembly, slide it back into place. Then, reinstall the bolts or screws that you previously stored safely. Make sure to tighten them enough so the headlight assembly doesn’t move while you drive your car.
9. Test the new headlights
Before driving your vehicle on the road, make sure to start the engine and test the headlights. If you followed this article step by step, you should have a working headlight.
How Do I Know If My Headlight Needs To Be Replaced?

If there is anything wrong with the way your headlights are currently functioning, they will need to be repaired or both headlights will need to be swapped.
There are two main ways that you can get an idea of whether or not you need to replace your headlights. The first is by doing an inspection of the outside housing, and the second is by checking how well they are illuminating the road during night driving.
You can start this process with a quick walk around the car.
1. Inspect the headlights visually
First, look at your headlights closely without turning on any lights inside or outside of your vehicle, you should be able to get a good idea for any obvious damage.
If you don’t see any cracks on the headlight assembly, inspect the condition of the front side of the headlights. Over time, headlights tend to haze. Also, water can get inside the housing and burn out the bulb.
Either way, the headlights shouldn’t be hazed or filled with water. If that is the case, you should inspect the headlight housing even further by removing the housing.
2. Check how well your headlights are illuminating the road during the night
If you only have one headlight that is working it would be very easy to check whether or not both headlights are producing light while driving at night.
If there are cracks in the bulb cover, you might be able to see it from the inside, but you will need a separate inspection process for that. However, if there is any damage to your headlight lenses after an accident or because of road debris, the entire housing assembly will need to be replaced so you can safely drive at night.
If your headlights do not seem to be producing light correctly, they could also simply need a good cleaning. Some vehicles include built-in washers and wipers for self-cleaning the headlights when running water over them while driving in rain and snow.
If there is nothing wrong with the lighting itself, then simply cleaning the headlight assembly could solve the problem. However, I would recommend checking out whether or not your headlights are damaged before attempting to clean them.
How Long Does It Take To Replace a Headlight Housing?
Replacing a headlight housing typically takes about 30 minutes to an hour per light, depending on the make and model of your vehicle.
This time estimate includes removing the old housing, installing the new one, and ensuring it’s correctly aligned.
However, if you have little to no experience in car maintenance, it might take longer, as you’ll need to familiarize yourself with the process.
Always remember to refer to your vehicle’s manual for specific instructions and safety precautions.
How Long Do Headlight Housings Last?
On average, you can expect a headlight housing to last 10-15 years before it needs to be replaced, but some might last even longer with proper care and attention.
The lifespan of headlight housings largely depends on the material they’re made from and the conditions they’re exposed to.
Most modern headlight housings are made of durable plastic, which can last for many years if properly maintained.
However, factors such as exposure to sunlight, harsh weather conditions, and road debris can cause the housing to become cloudy or damaged over time.
Do Headlight Assemblies Come With Bulbs?
Usually, the headlight assemblies do not include bulbs. However, if your old headlight bulbs are operational, you can easily install them on the new headlight assembly.
How Do I Know What Size My Car’s Headlights Are?
Check your owner’s manual for the correct headlight size specification. The information will also help determine which replacement bulb to use based on its design and application. If no size is mentioned, use the same type/size as before.
Vehicle owners may also check with their authorized dealer for more specific information about headlight sizes available for their particular model. Also, check the vehicle’s warranty conditions to know what replacement bulbs are allowed.
How Do I Know If My Headlight Regulator Needs To Be Replaced?
- Dim or flickering headlights: If your headlights are not as bright as they used to be, or if they flicker when turned on, this may indicate a problem with the headlight regulator.
- Inconsistent light output: If one headlight is brighter than the other, or if the brightness varies randomly, the regulator might be faulty.
- Headlights don’t turn on: If your headlights don’t turn on at all, even after changing the bulbs, it could mean that your headlight regulator needs to be replaced.
- Frequent bulb burnout: If your headlight bulbs are burning out more frequently than usual, it might indicate an issue with the headlight regulator.
- Warning light on dashboard: Some vehicles have a warning light on the dashboard that illuminates when there’s a problem with the headlight system.
FAQs
Q: What tools do I need to replace a headlight housing?
A: You will need the following tools:
- Screwdriver
- Socket set
- Wrench
Q: Can I replace a headlight housing myself?
A: Yes, you can replace a headlight housing yourself if you have the necessary tools and knowledge.
Q: How long does it take to replace a headlight housing?
A: The time it takes to replace a headlight housing can vary depending on your experience and the specific vehicle, but it usually takes around 30 minutes to an hour.
Q: What is the cost of replacing a headlight housing?
A: The cost of replacing a headlight housing can vary depending on the make and model of your vehicle, as well as the type of headlight housing you are replacing. Generally, the cost can range from $50 to $200.
Q: Are headlight housings interchangeable?
A: Headlight housings are usually specific to a certain make and model of vehicle, so they may not be interchangeable between different vehicles.
Q: How often should I replace my headlight housing?
A: Headlight housings are durable and can last for many years. However, if your headlight housing becomes damaged or worn out, it should be replaced as soon as possible to ensure proper visibility on the road.
Q: Where can I buy a replacement headlight housing?
A: Replacement headlight housings can be purchased at auto parts stores, online retailers, and at some car dealerships.
Q: Do I need to disconnect the battery before replacing a headlight housing?
A: It is generally recommended to disconnect the battery before replacing a headlight housing to avoid any electrical accidents.
Q: Can I replace just one headlight housing or do I need to replace both?
A: You can replace just one headlight housing, but it is recommended to replace both at the same time to ensure even lighting on the road.
In Conclusion
Replacing a headlight housing is an easy DIY job that requires minimal effort and time.
As long as you have the correct tools and replacement parts, replacing your headlight housing can be completed in just a few steps.
Make sure to always wear safety glasses when working on any automotive repair tasks, such as replacing a headlight housing.