
I was driving around the other day and as I was about to make a complete stop, my steering wheel started shaking as soon as I pressed my brake pedal.
To be honest, I didn’t know what was causing the issue right away. So, I talked to a couple of mechanics and did research online. Here is why my steering wheel is shaking when I hit the brakes.
Key Takeaway
- Your steering wheel may be shaking when you brake due to issues in your braking system, such as warped brake rotors, worn brake pads, improperly installed rotors, or dry caliper guide pins.
- Warped brake rotors can be caused by excessive heat from hard braking, stop-and-go traffic, slamming on the brakes, a caliper locking up, or other problems that lead to excessive heating of the rotor
- To check if your brake rotor is warped, look for symptoms such as vibrations or pulsations in the brake pedal, abnormal noises, or uneven brake pad wear, or you can physically inspect the rotor for signs of damage or measure it with a dial indicator for any run-out.
Why Is My Steering Wheel Shaking When I Brake?
- Warped Brake Rotors
- Worn Brake Pads
- Improperly Installed Rotors
- Dry Caliper Guide Pins
Warped Brake Rotors
Warped brake rotors are one of the most common causes of a shaking steering wheel when braking. Brake rotors can warp due to excessive heat, which can be caused by heavy braking or braking over long distances.
This warping creates an uneven surface that, when contacted by the brake pads during braking, results in vibrations that can be felt through the steering wheel.
Worn Brake Pads
Worn brake pads can also cause your steering wheel to shake when you brake. The brake pads are designed to create friction with the brake rotors, slowing down the vehicle.
Over time, this friction can wear down the brake pads, causing them to become thin and less effective. When the brake pads are worn down, they can vibrate against the brake rotors, causing the steering wheel to shake.
Improperly Installed Rotors
If your brake rotors are not installed properly, it could result in your steering wheel shaking when you brake. If the rotors are not correctly aligned or securely fastened, they can wobble when the brakes are applied, sending vibrations through the brake system and into the steering wheel.
Dry Caliper Guide Pins
Dry caliper guide pins can also cause a shaking steering wheel when braking. The caliper guide pins allow the brake caliper to slide back and forth smoothly when the brakes are applied. If these pins become dry or corroded, they can stick, preventing the caliper from moving properly.
This can cause the brake pads to apply uneven pressure to the brake rotor, resulting in vibrations that can be felt through the steering wheel .
What Causes a Warped Brake Rotor

Driving around with a warped brake rotor will cause your steering wheel to shake when braking. It is both an unpleasant experience and a safety issue. So, what causes a warped brake rotor? Here are some answers for you:
1. Overheating issues

The temperature of the brake rotors increases each time you apply the brakes. Sometimes, during the braking application, the caliper piston can get stuck and it could ”burn” the brake rotors. This is what we call overheating issues.
Another issue that could cause overheating issues on the brake rotors is the pads sticking in the bracket. When this happens, something like burn marks will appear on the brake rotors. That’s gonna be a raised area, especially once the rotor gets hot from driving and it’s gonna cause brake pulsation.
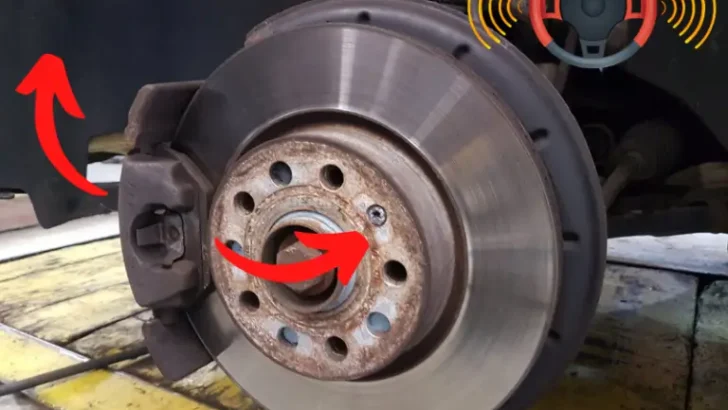
In order to verify that your brake rotor has been warped due to overheating issues, you will have to perform a visual inspection. Remove the wheel and carefully inspect the brake rotors. If you see areas on the brake rotors looking like hot spot lines that are just going straight, these lines are going to build up more and more.
So, when you press the brakes, the caliper will apply pressure on the brake rotors and when it goes over the build-up lines, you are going to feel a braking pulsation. At this point, your braking system has an overheating issue that has to be addressed properly.
2. Rust pits on the brake rotors
If your vehicle has been sitting for a long time, your brake rotors can and will accumulate rust on them. The build-up rust on the brake rotors will cause an uneven surface and your brake rotors will appear warped.
If you see little dimples on the brake rotor, those are actually rust pits. What happens is is after your vehicle has been sitting for a long period of time, it’ll accumulate moisture along the whole braking surface.
As that moisture sits there for a while, it makes its way into the rotor’s porous materials since the braking rotors are made out of metal.
The rust starts making these little pits. Then, once you drive the vehicle, it’ll take off the outer portion of the rust and it’ll just kind of leave all these pits causing an uneven surface.
Rust on the brake rotors will most definitely cause a braking pulsation, shaking steering wheel, and even noise.
3. Damaged surface from metal-to-metal contact
If the caliper piston is stuck in the braking position, it will apply constant pressure on the braking pads against the brake rotor and will damage the rotor’s surface.
The way braking works is when you press the brake pedal, the braking fluid travels through the braking pistons making it squeeze the pads against the braking rotor. If the piston is stuck in this position, it will constantly push the braking pads into the braking rotor and will damage the rotor’s surface.
The caliper pistons need to squeeze the braking pads when you press the brake pedal and then retract once you release the braking pedal. You could perform a visual inspection in order to see if your braking pistons are working properly.
Also, you can just drive your vehicle as slow as possible and if you hear a grinding sound, you should check your braking system.
4. Wear and tear
Brake rotors can become warped if they are used for too long. How long do brake rotors last depends on your vehicle size, driving style, and quality. In general, most brake rotors will last anywhere between 50,000 to 70,000 miles.
If your vehicle has been sitting for too long, or you have been driving it for way too long without replacing the brake rotors, they can become warped. As I said earlier, a warped brake rotor will cause your steering wheel to shake while braking.
It is best that you change your brake rotors every 50,000 to 70,000 miles. But, I recommend checking the thickness of the braking rotors before replacing them. Depending on your driving style, brake rotors can last even more than predicted.
5. Drastic temperature changes

Each time you apply the brakes, the brake rotor increases its heat. Typically, most braking rotors are built to withstand temperatures up to 209 degrees Celsius or 408 degrees Fahrenheit. So, imagine you are driving around the city and you are constantly applying the brakes. Normally, the brake rotors would get heated.
Then, you take your vehicle to the car wash. Now, you are washing your heated brake rotors with cold water. Washing your heated brake rotors with cold water will cause a thermal shock and your brake rotors will warp over time.
How To Check If My Brake Rotor Is Warped
Measuring the brake rotors for minimum thickness on both the front and rear brake rotors will show if your brake rotors are warped.
A front brake rotor that has an uneven surface will cause the steering wheel to shake when we brake. The rear brake rotor will only cause a pulsation in the brake pedal if it’s warped. Here is how to measure the thickness of your brake rotors and check if it’s warped:
1. Gather the required materials for measuring brake rotors
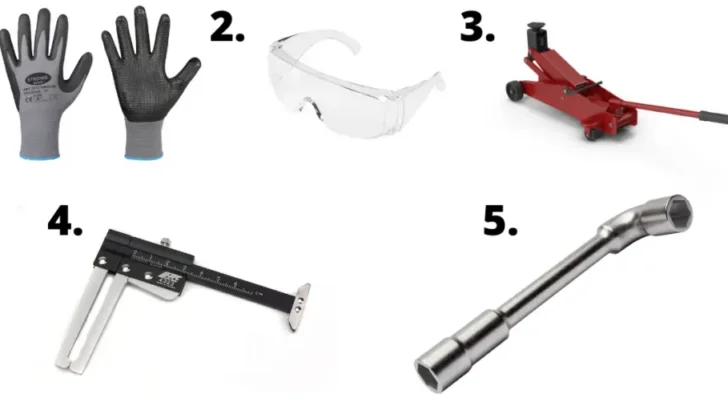
You need to have the right tools in order to measure the thickness of your brake rotors and check if your brake rotors are warped. So, before starting this procedure, make sure that you gather the required materials:
- Safety gloves. I always prefer wearing safety gloves when working on my car because of the many corrosive liquids that can cause skin damage. (See safety gloves on amazon.com).
- Safety goggles. Ever since I accidentally spilled engine oil in my eye, I started wearing safety goggles when working around cars. Please don’t wait for an accident to happen and get yourself some safety goggles. (See safety goggles on amazon.com).
- Car Jack. You will need to lift your vehicle in order to check the thickness of your brake rotors. So, if you don’t have a car jack, you can get one from amazon.com.
- Brake rotor gauge. The measuring of the thickness of the brake rotors is done by a specially designed gauge. I got this electronic gauge on amazon.com and I am satisfied with both the price and the performance.
- Lug wrench. This telescoping lug wrench comes with a 17mm and 19mm socket, which makes it perfect for this job. You can order this lug wrench on amazon.com.
2. Jack up the vehicle
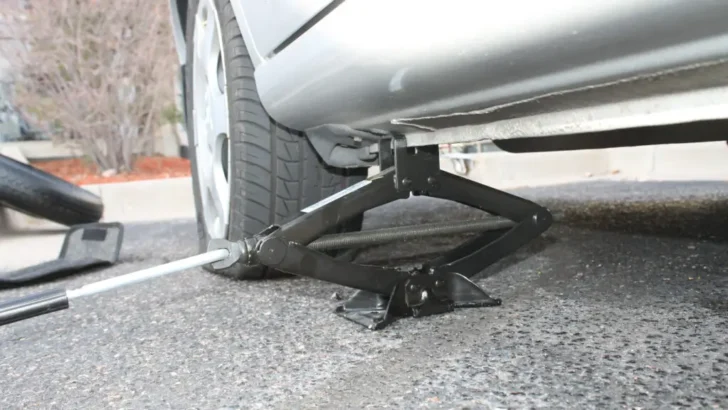
In order to check if your brake rotor is warped, you will need to gain access to the brake rotor by removing the wheel.
Park your vehicle on leveled ground and secure the wheels with bricks or wooden pieces. Then, jack up your vehicle and place it on jack stands. To find out what are the jacking points for your vehicle, please read the owner’s manual.
3. Remove the wheel
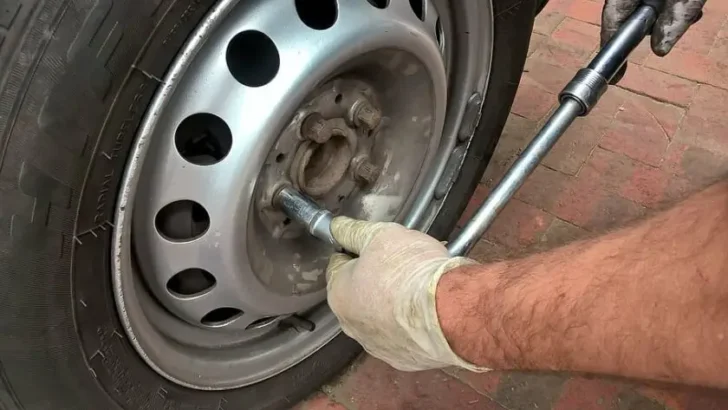
Remove the wheel by removing the lug nuts. The size of the lug nuts may differ, but in most cases, you will need a 17-millimeter or 19-millimeter drive and a 1/2 ratchet for better leverage.
At this point, one side of your vehicle is lifted. Be careful when applying force to remove the lug nuts as it might start swaying. Safely store the lug nuts and the wheel as you will be reinstalling it later on.
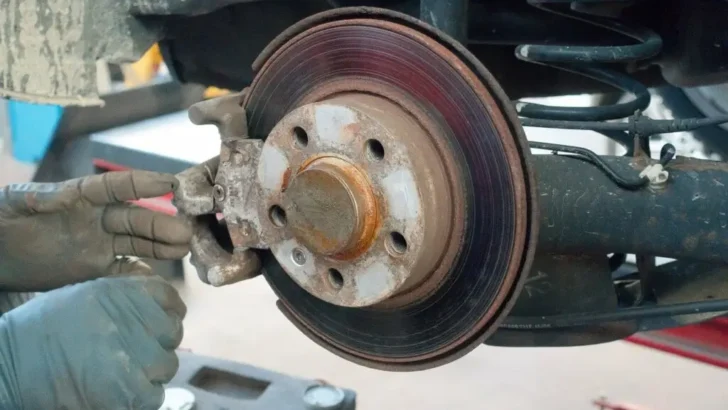
4. Remove the caliper
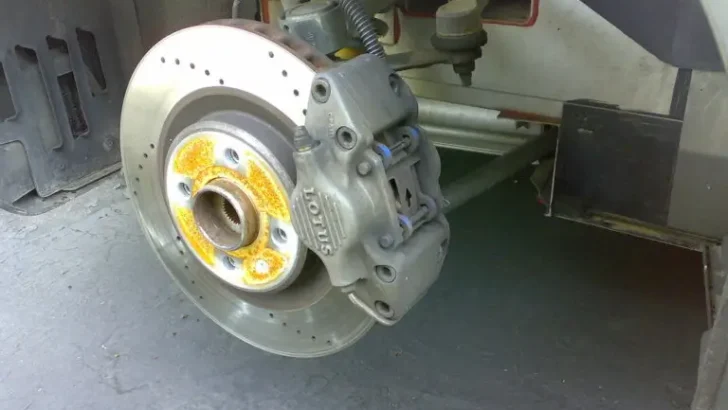
After the wheel is off, remove the caliper by removing the two bolts located on the backside. Then, safely attach the caliper to the spindle using straps to hold the caliper in a safe position that we don’t stress the hose. Never let a caliper hang on its hose because it will damage it.
5. Measure the brake rotor using the measuring tool

Zero out your brake rotor measuring tool before you start the procedure. Place the micrometer on the brake rotors and take measurements in multiple places. If the measurements of the brake rotor are different in different locations, then it is safe to say that your brake rotor is warped and needs replacing.
The minimum thickness of the front brake rotors is 19 millimeters and eight millimeters on the back brake rotors. Anything below 19 millimeters on the front brake rotors or below eight millimeters on the back brake rotors is considered below specification.
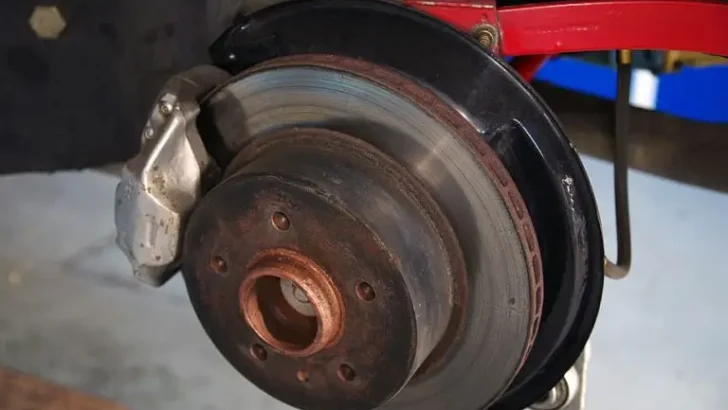
6. Reinstall the parts
After you are done with measuring the thickness of the brake rotors, reinstall the caliper and the wheel. If your brake rotor’s thickness was below the minimum, I suggest you replace your old brake rotors with new ones. Also, while you are at it, you can check the brake pads as well.
FAQs
Q: What is a brake rotor?
A: A brake rotor is a disc-shaped component that is part of the brake system. It connects to the wheel hub and rotates with the wheel. When the brake pedal is pressed, the brake pads press against the rotor to slow down or stop the vehicle.
Q: How does a brake rotor cause the steering wheel to shake?
A: If the brake rotor becomes warped or unevenly worn, it can cause the steering wheel to shake when you apply the brakes. The uneven surface of the rotor can create vibrations that are felt in the steering wheel.
Q: What is a brake pad?
A: A brake pad is a friction material that is pressed against the brake rotor to slow down or stop the vehicle. It is an essential component of the braking system.
Q: Can worn brake pads be a cause for a shaky steering wheel?
A: Yes, worn brake pads can contribute to a shaky steering wheel. As brake pads wear down, they may not provide proper friction against the rotor, leading to vibrations and shaking in the steering wheel when you brake.
Q: What are some other common causes for a shaky steering wheel?
A: Other common causes for a shaky steering wheel include warped brake rotors, suspension issues, problems with the steering system, and malfunctioning brake calipers.
Q: How can I diagnose the cause of a shaking steering wheel?
A: Diagnosing the cause of a shaking steering wheel typically requires the expertise of a qualified auto repair professional. They can inspect and test various components of the brake system, suspension, and steering system to pinpoint the underlying issue.
Q: Is it safe to drive with a shaking steering wheel?
A: It is not recommended to drive with a shaking steering wheel as it can indicate a problem with the brakes or suspension. Continuing to drive in this condition can compromise your safety and the safety of others on the road. It is best to have the issue diagnosed and repaired as soon as possible.
Q: What are the potential consequences of driving with a shaky steering wheel?
A: Driving with a shaky steering wheel can cause further damage to the brake system, suspension components, and steering system. It can also affect the overall handling and control of your vehicle, making it more difficult to drive safely.
Q: How long does it take to fix a shaking steering wheel?
A: The time it takes to fix a shaking steering wheel depends on the underlying cause of the issue. It can range from a simple brake pad replacement to more extensive repairs like resurfacing or replacing the brake rotors. An auto repair professional can give you a better estimate after diagnosing the problem.
In Conclusion
If your steering wheel is shaking when you brake, it’s generally due to issues with your vehicle’s braking system.
The most common cause is warped brake rotors, which create an uneven surface that, when squeezed by the brake pads, results in vibrations felt through the steering wheel.