
Headlights are essential for safe driving, especially in conditions with poor visibility.
However, over time, they can become foggy due to oxidation, dirt, and exposure to UV light, which can severely reduce their effectiveness.
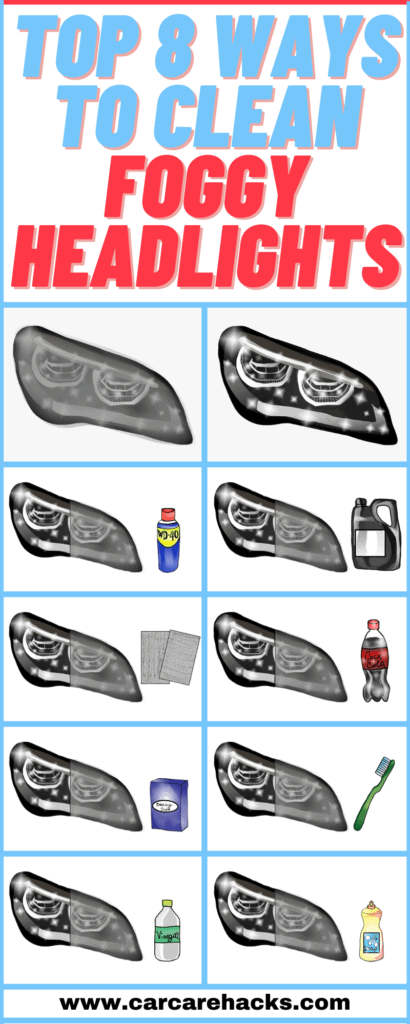
If you’re struggling with foggy headlights, don’t worry! In this guide, we will explore the top 8 ways to clean foggy headlights.
These methods range from simple home remedies to professional services, so you can choose the best option for your needs and budget. Let’s dive in and get those headlights shining bright again!
Key Takeaway
- Headlights become foggy primarily due to exposure to ultraviolet light from the sun, which degrades the plastic lenses over time, and they can also become foggy from water ingress due to a leak in the headlight from a small crack or broken seal.
- To clean foggy headlights with toothpaste, you need to apply a layer of toothpaste on the headlight lens, scrub it thoroughly using a damp cloth, and then rinse off the toothpaste with water and wipe it dry.
- To clean foggy headlights with sandpaper, wet-sand the surface of the headlights with progressively finer grits of sandpaper, then polish and seal them for a clear finish.
- To clean foggy headlights with a UV coat, first clean and dry the headlights, then apply the UV protective coating evenly over the surface to restore clarity and protect from future damage.
- To clean foggy headlights with vinegar, mix equal parts of white vinegar and water in a bowl, dip a cloth into the mixture and scrub the headlight, then rinse off with warm water and dry thoroughly.
- To clean foggy headlights with baking soda, create a paste from a mixture of baking soda and water, apply it to the headlight using a sponge or cloth, scrub thoroughly, then rinse and dry for a clear finish.
- To clean foggy headlights with WD-40, spray a generous amount onto the headlight lens, rub it in using a soft cloth, and then rinse with water for a clearer, brighter headlight.
- To clean foggy headlights with Coca-Cola, pour the soda onto a cloth and scrub the headlight thoroughly, then rinse with warm water and dry off for a clear finish.
- To clean foggy headlights with dish soap, mix a few drops of the soap with warm water, apply the mixture onto a sponge or cloth, scrub the headlights thoroughly, then rinse and dry for a clear finish.
Why Headlights Become Foggy?
Headlights become foggy or cloudy due to a few different factors:
Oxidation: The most common reason for foggy headlights is oxidation. Over time, the protective layer on the plastic lens of your headlights can degrade due to exposure to sunlight and UV rays. This oxidation can cause the lens to turn yellowish and appear foggy.
Dirt and Grime: Your car’s headlights are constantly exposed to dirt, dust, and road grime. If not regularly cleaned, these elements can stick to the surface of the headlights and create a foggy appearance.
Moisture: Headlights are designed to be sealed to prevent moisture from getting inside. However, if the seal is broken or damaged, moisture can get into the headlight housing and condense on the inside of the lens, leading to a foggy appearance.
Age and Wear: Just like any other part of your car, headlights are subject to wear and tear. Over time, the constant exposure to heat from the bulbs, as well as cold and inclement weather conditions, can cause the lens to become cloudy or foggy.
Top 8 Ways To Clean Foggy Headlights:
- With a toothpaste
- With Sandpaper
- UV Coat
- Vinegar
- Baking Soda
- WD40
- Coca-Cola
- Dish Soap
It is very important to have clean headlights while driving, especially at night. You want to make sure you have good visibility in order to avoid accidents.
You don’t have to spend money to clean your headlights, you can do it with some household items. Please note that the cleaning done with the household items is not Permanent.
But don’t worry, I have included a permanent cleaning method in this article. As a bonus tip, you will find how to fix your headlight with moisture in it.
You can basically find every information about your headlight maintenance in this article. Let’s get started:
How To Clean Your Headlights With Toothpaste

Cleaning your headlights with toothpaste involves applying toothpaste to a rag and scrubbing the headlight, then rinsing it off with water and wiping down with a clean microfiber cloth in circular motions.
Step 1: Apply Toothpaste
Squeeze out a bit of toothpaste onto a rag. The type of toothpaste doesn’t matter too much, as long as it’s a paste and not a gel. The slight abrasiveness of the toothpaste helps to remove the grime on the headlights.
Step 2: Scrub the Headlight
Use the rag with the toothpaste to scrub the headlight. You can scrub in any motion you prefer, as circular motion doesn’t add any particular benefit. The goal is to cover the entire surface of the headlight with the toothpaste and scrub off the grime and fog.
Step 3: Rinse Off the Toothpaste
Once you’ve finished scrubbing, rinse off the toothpaste from the headlights using a spray bottle or hose. This helps break up the toothpaste and makes it easier to remove.
Step 4: Wipe Down the Headlight
Take a clean microfiber cloth and wipe the headlights in circular motions. This helps buff the surface and remove any remaining toothpaste or grime. It also helps dry the headlight and leaves it clean and clear.
Step 5: Repeat if Necessary
If the headlights are still foggy or dirty after the first round of cleaning, you can repeat the process. Some headlights may require several rounds of cleaning before they’re fully clear and clean.
How To Clean Your Headlights With Sandpaper

Cleaning your headlights with sandpaper involves wet-sanding the headlights with increasingly finer grits of sandpaper, then polishing them to restore clarity.
Step 1: Prepare Your Headlights
Start by cleaning your headlights with soap and water to remove any dirt or grime. Then, mask off the surrounding areas of the headlight with painter’s tape to protect the paint and trim from accidental scuffing.
Step 2: Wet-Sand the Headlights
Begin with a lower grit sandpaper (like 600-grit) to remove the outer layer of oxidation. Soak the sandpaper in water for a few minutes before using it. Sand in one direction (not in a circular motion), keeping the surface and the sandpaper wet at all times. This process is called wet-sanding.
Step 3: Progress to Finer Grit Sandpaper
Once you’ve evenly sanded the entire headlight with the lower grit sandpaper, rinse off the residue and progress to a finer grit sandpaper (like 1000 or 2000-grit). Repeat the wet-sanding process, but this time sand in a perpendicular direction to the first round of sanding. This helps reduce the appearance of scratches.
Step 4: Polish the Headlights
After you’ve sanded the headlights with the finest grit sandpaper, rinse off the residue and dry the headlights. Apply a plastic polish to a clean microfiber cloth and buff the headlights until they shine.
Step 5: Protect Your Headlights
Finally, to prevent future oxidation, apply a UV sealant or clear coat specifically designed for plastic headlights. Allow the sealant to dry according to the product’s instructions.
Dura-Gold Premium Sandpaper
You should now have clean headlights. Take a before and after picture to see the results. You saved yourself two headlights which is a decent amount, especially on some cars that could be $200-$300.
How To Clean Your Headlights With Baking Soda and Vinegar

Another great way to clean your foggy headlights with $0 spent. All of us have vinegar and baking soda at home. In addition, you will need some clean towels and that’s all.
- Start off by mixing vinegar with water. If you have a spray bottle, add the mixture to it. You will need to clean the dust off from the headlights. Spray the cleaning solution and wipe your headlights with a clean towel. You can also use this solution for your windows.
- For the second step, you will need to mix vinegar with baking soda. Mix them with a ratio of 2:1 with 2 for white vinegar and 1 for baking soda. You will see a chemical reaction, but do not worry, this is not harmful to you. You don’t need to use gloves.
- Apply this mixture to your headlights and start wiping them. With a clean towel and circular motions, wipe until you get the wanted results. You can repeat this process as many times as you want.
- And for the last step, you will need some clean water and a clean towel. Rinse off your headlights with water and wipe them with a towel. You can also use a sponge to rinse the headlights.
Baking Soda
How To Clean Your Headlights With WD40

Many people think that WD40 can be used only on metal. Many people don’t know that WD40 can be used for cleaning as well. WD40 will clean your foggy headlights without damaging the plastic. You will need some other household items besides WD40. Let’s start:
- Your headlights probably have some dead bugs on them, as well as dust. Start by wiping them with a paper towel or baby wipes.
- Mix toothpaste with baking soda in a bowl. Apply the mixture on the headlights and spread it evenly with a scouring pad. Wipe in circular motions until you see your lights clear.
- Spray water on the headlights and wipe them with a clean towel. You will notice that your lights are much cleaner than before, but this is not the end.
- Buff the headlights with the WD40. Buff them until you get the wanted results.
I have a more detailed article on how to clean your foggy headlights with WD40. Check it out here.
WD40
How To Clean Your Headlights With Coca-Cola

I use coca cola to clean many things, and it’s so scary. I used to drink so much coca cola and when I saw that people actually clean with it, I stopped drinking it. Now I use it to clean my foggy headlights. And I can say that it’s doing a pretty good job.
- Start off by wiping the dirt from your headlights with a towel soaked in water.
- Apply the coca cola on your headlights. You can either spray the Coca-Cola (if you have a spray bottle) or soak a sponge or a towel and apply it on your headlights.
- Leave it for 5 minutes.
- Wipe your headlights with a clean towel.
- Wash them off with water.
- If your headlights are very dirty, you might not get results with only one cycle. Repeat the process as many times as needed.
How To Clean Your Headlights With Dish Soap

This method is very simple and works. The good thing is that it’s gonna cost you $0. We all have dish soap at home, as well as baby wipes and towels.
- Wipe your headlights with a baby wipe to remove the dust.
- Apply some hot water to your headlights.
- Apply some dish soap and leave it to sit for 5 minutes.
- Start wiping in circular motions.
- Rinse your headlights with hot water.
- Repeat the process as needed.
Mrs. Meyer’s Dish Soap
How To Clean Your Headlights(Permanently) With UV Coating
 With UV Coating")
This is a great way to clean and restore your foggy headlights permanently. This will cost you around $10 per headlight.
The other methods with home remedies such as vinegar, baking soda, toothpaste, or the 3m kit work great, but they are not permanent. Your lights will eventually become hazy and oxidized.
I’m about to show you the only permanent method that doesn’t require any maintenance such as adding wax or adding a sealer every so often.
Not only do hazy oxidized headlights look bad, but they also decrease the value of your car.
So not only will you make your car look better, but you’re actually going to help increase the value of the car by fixing your headlights.
Everything you need to do the job:
- Scissors
- Garbage Bag
- Tape
- Paper Towels
- Sandpaper 400grit, 600grit, 2000grit
- Spray the bottle with water
- Alcohol
- Gloss Clear for plastic
The big thing is you want them to be non-yellowing and UV resistant.
The reason why your headlights are all foggy, yellowing, and oxidized is that the clear coat on the headlights gets chipped off over time from rocks hitting it from just.
This method is going to put a nice barrier so that the plastic can’t get yellow and hazy again. Most people have scissors and a garbage bag and some paper towels, but if you’re going to buy the other stuff it’ll cost you around $20.
So you figure, to make your headlights permanently clear $10 a headlight. That’s not bad, especially since some headlights can cost over $100. I’ve seen headlights that are $250 each. I’ll show you the whole process. It’s quick and easy.
UV Coating Product
Get Started
- If your headlights are easily removable I would remove them. It’s a lot easier to do this off the car. If not, you can do this process without removing your headlights.
- Tape around the headlight(if you are not going to remove it). Make a nice barrier around the edge. I usually use extra wide painter’s tape.
- Put the garbage bag around the light to fully cover the pain in the vehicle.
- Start with 400-grit sandpaper. If your headlights aren’t that bad, you could start with 600-grit sandpaper which is a little bit finer. Then we’ll finish it off with a little bit of 2,000 grit which is super fine.
- Spray the headlight with water. Make sure both surfaces are nice and wet. The water acts as a lubricant and prevents deep scratches on the surface.
- Start with circular motions. Do not apply a lot of pressure. You’ll notice a milky color running down. That’s all that oxidized yellowing plastic that’s coming off your headlight.
- Move to the 600 grit. Again get your headlight nice and soaking wet, get your sandpaper nice and soaking wet. Do a bunch of swirling motions with the 600 grit, then start with horizontal sanding. With this type of sanding, you will have that top layer of the oxidized headlight completely removed.
- Clean the headlight with water before starting the next step.
- Move up to the 2,000 grit. You don’t want to press really hard on this, you just want to skim the surface. You’re just going to cut down some of the edges that the 600 grit put on here. After you do enough of the swirling motion, you could do the horizontal motion. This is going to be the final touch. Don’t worry if your headlights are still hazy.
- Dry it with a paper towel.
- Get your alcohol and put it on a low-lint paper towel. Clean the headlight lens off. The alcohol removes any oils from your hands that may have gotten onto the lens, and it also makes the lens dry quickly. You can apply alcohol multiple times.
- As your alcohol is drying, cut your garbage bag open.
- Start your clear coat application. Make sure you follow the instructions on your clear coat. You don’t want thick coats. Thick coats are going to run. Make sure you do light coats, even sprays.
- Let it sit for five minutes and then add another coat. Add 3-4 layers with a 5-minute rest in between. Make sure when you’re spraying you’re also getting the top edge of the light and the corners of the light. Depending on how your light is shaped, you want to make sure that you touch all the spots on the light.
That’s it. The UV Coat does not only make your headlights look good, but it’s going to protect the headlight.
It’s going to bounce all those harmful UV rays out and It’ll prevent any future yellowing or hazing or oxidation. This is permanently going to stay like this.
You can also add some wax, but it’s optional.
BONUS: How To Fix Headlight With Moisture In It
You might have noticed that some headlights have water drops in them. This is actually an issue. There shouldn’t be water inside the headlights. If the water gets into contact with your light, it will burn it.
This is an easy fix and you don’t need to be a mechanic to perform this task.
Follow my step-by-step guide:
- Start off by removing your headlight. All headlights have 2 or 3 bolts that you need to unscrew. Usually, there is one on the left and one on the right side as well as one on the bottom of the headlight. After you remove the bolts, you will have to disconnect the cable.
- After you removed the headlight and the cable connected to it, take your light bulb out.
- Fil your headlight with water all the way to the top.
- See where the leakage is.
- After you locate where your leakage is, take the water out and dry your headlight.
- After you dry your headlight, clean the surface where the water is leaking from. You can use a glass cleaner or just soapy water.
- If the surface is rough, you can sand it a little bit.
- Apply silicon on the surface and spread it with your fingers. Leave it to dry.
- You can test to see if you sealed the leak by filling the headlight with water.
- Re-install your headlight.
How Do You Get The Moisture Out of Headlights Without Taking It Apart?
There are several ways you can try to remove moisture from your headlights without disassembling them:
Use a Hair Dryer: This is a straightforward method. You can use a hairdryer on a warm setting and direct it towards the headlight. The heat will cause the moisture to evaporate. Make sure to move the hairdryer around to prevent any damage from concentrated heat.
Employ a Dehumidifier: If you have access to a garage and a dehumidifier, this can be a good option. By running the dehumidifier in a closed garage with the car inside, it should gradually draw out the moisture from the headlights.
Park in the Sun: The natural heat of the sun can also help to eliminate the moisture. On a sunny day, you can park your car in a spot where the headlights get plenty of sunlight, which should help the moisture to evaporate.
Drill Small Holes: As a last resort, you can drill small holes at the bottom of the headlight casing to allow the water to drain out. But be careful, this could lead to more moisture getting in if not properly sealed afterward.
These methods may provide a temporary solution, but if moisture continues to collect in the headlights, it’s advisable to seek professional assistance to rectify the underlying issue causing the problem.
FAQs
Q: Can I use toothpaste to clean foggy headlights?
A: Yes, toothpaste can be used to clean foggy headlights. Apply a small amount of toothpaste to a cloth or sponge, and gently rub it onto the headlight surface in circular motions. Rinse off the toothpaste with water and dry the headlights afterwards.
Q: Is there a specific type of toothpaste I should use?
A: It is recommended to use regular white toothpaste rather than gel toothpaste or any toothpaste that contains abrasives. Gel toothpaste may not be as effective in cleaning foggy headlights, and toothpaste with abrasives can cause scratches on the headlight surface.
Q: Can I use vinegar to clean foggy headlights?
A: Yes, vinegar can be used to clean foggy headlights. Mix equal parts of vinegar and water, and apply the solution to the headlights using a cloth or sponge. Scrub gently in circular motions, then rinse and dry the headlights thoroughly.
Q: How often should I clean my foggy headlights?
A: It is recommended to clean foggy headlights as soon as you notice a decrease in brightness or clarity. Regular maintenance can help prevent the foggy buildup from becoming worse and affecting your visibility while driving at night.
Q: Are there any commercial products available for cleaning foggy headlights?
A: Yes, there are several commercial products specifically designed to clean foggy headlights. These products can be found in automotive stores or online. Be sure to follow the instructions provided on the product packaging for best results.
Q: Can I prevent my headlights from getting foggy?
A: While it is difficult to completely prevent headlights from getting foggy, there are some steps you can take to minimize foggy buildup. Regularly washing and waxing your car, keeping your headlights clean, and parking in shaded areas can help reduce the effects of oxidation and UV exposure.
Q: Why is it important to clean foggy headlights?
A: It is important to clean foggy headlights because they can significantly reduce your visibility while driving at night or during adverse weather conditions. Clear and bright headlights enhance your safety as well as the safety of other road users.
Q: Can I use sandpaper to clean foggy headlights?
A: It is not recommended to use sandpaper to clean foggy headlights unless specifically instructed by a professional or mentioned in the product instructions. Sandpaper can be abrasive and may cause scratches or further damage to the headlight surface.
In Conclusion
In conclusion, foggy headlights can be a hindrance to your driving visibility and the overall aesthetic of your car says MotorWeek.
The top 8 ways to clean foggy headlights, including using toothpaste, baking soda, vinegar, a headlight restoration kit, sandpaper, insect repellent, dish soap, and professional restoration services, offer a variety of options to suit different situations and preferences.
Whether you’re looking for a quick, budget-friendly DIY solution or a professional service for severe cases, there’s a method to help restore your headlights’ clarity.
Maintaining clear, bright headlights not only enhances your vehicle’s appearance but also ensures optimal safety on the road.